Thursday, 10 January 2013

A taste of spring

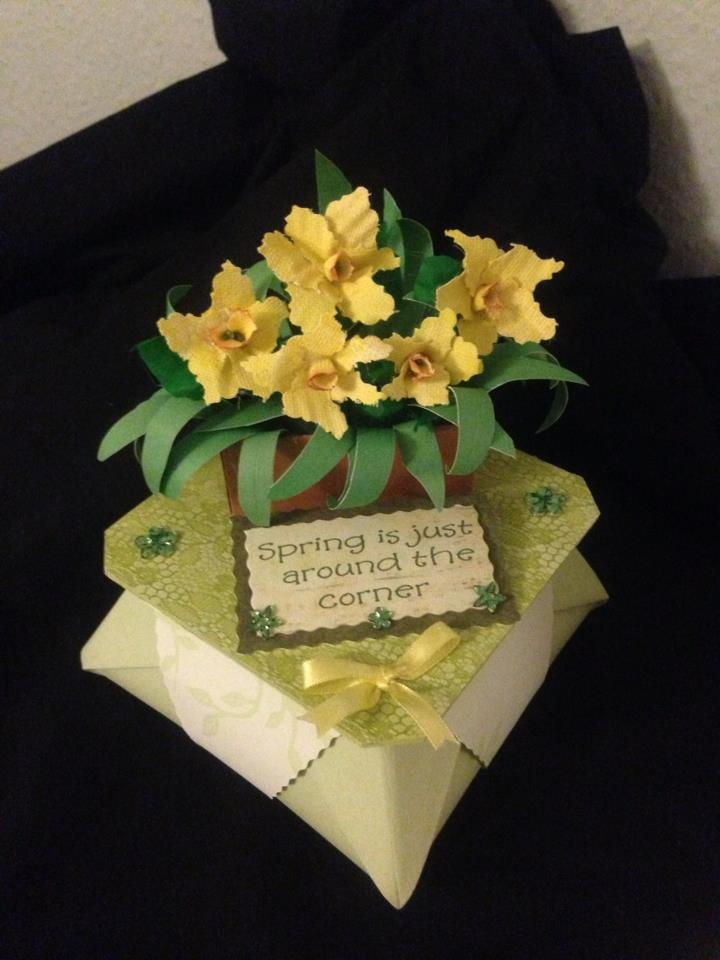
Its been a few days since my last blog, so I thought I would pop in tonight . I have been very happy that you lovely folks have been stopping by and visiting me as this has been my first proper week at blogging since joining again. I have been in my craft room as usual, and after reading so many pages it seems we are all taken with the fact that a few days of sun makes us think of warmer days to come. With this in mind and of course my obsession with the origami boxes I have designed a little springtime box - complete with a little window planter full of daffodils.
I would like to give this away as a Thank You for taking the time to come and see me so if anyone would like to have a chance of winning  it, drop an email and link to your blog and I will pick a winner at random next Friday

Happy makings   Bev xx

Monday, 7 January 2013

Grand Tea Swap

Good evening fellow bloggers , just a quick post and a Thank You to Lucy in the sky for organising the Grand tea swap , I am really looking forward to it Its not to late to join in so pop over to Lucy's blog for details

Saturday, 5 January 2013

Somebody save me ..............Part 2

After a couple of coats of antique white homemade chalk paint , the table is ready for the fun part - lets pretty it up . I knew exactly what I wanted to do with it , but without an o/head projector or any decals , I had to improvise..... I printed my image onto iron on transfer paper and hoped for the best!!!!! Ok it was a bit hit and miss (my iron doesn't get hot enough really)but the effect was what I wanted - grainy, faded and very vintage I was quite pleased after everything was done.
A few little twiddly bits around the outer edges and a nice coat of varnish - the coffee table from hell now able to sit back in the living room and be admired (I hope), and you've probably guessed already , the daughter who was throwing it out , has asked if she can have it back!!!!! Whats a Mum to do ??? Happy makings Bev xx

Somebody save me ..........part 1

My daughter recently moved house and lurking in the corner was this lovely pine coffee table that the previous owners had left behind . I asked her what she was going to do with it " throw it out " she said. Now you can imagine the look on the husbands face when I asked him to put it in the car, as I must admit it was quite a sorry sight to behold at this point ( one to many dinners from the children squished on it , yuck). Well everything needs a little love now & then , so after a good washing down and some industrial strength elbow grease supplied by yours truly the table was ready for its makeover
( I apologise for the picture , in my hast to get started I almost forgot to take one, oops)

Friday, 4 January 2013

Sweetly scented neighbours

Towards the end of the last summer I finally plucked up the courage to go and knock on the door of one of my neighbours whom I don't really know that well. It wasn't just a random visit , I did have a purpose, you see her front garden is lined on all sides by the loveliest lavender bushes (something I just cant seem to grow!!!), so armed with cap in hand , or should I say empty paper bag I finally asked her if I could cut some of the lavender heads for myself , she was only to obliging telling me that her son would just throw them into the recycling bin when it was time for them to be pruned back and that I could help myself whenever I wanted. I placed the cut lavender heads in my craft room to dry out, now and then knocking the bag when I was frantically looking for something which gave off the most beautiful scent. Well today I decided to use these beautiful flowers , so I sat down at my sewing machine , lap full of linen , a few printed images and scraps of ribbon & lace ..... and here we are
the sweetest smelling hearts to hang around the house ( I did pop one over to my neighbour as a thank you for letting me have the flowers ) Happy makings Bev xx
Wednesday, 2 January 2013

papercrafting for fun

As I previously mentioned I have been playing around with this origami box design , this is the latest one I have made. I wanted a nostalgic feel to it , so I started by using a chocolatey brown heavyweight paper to make the bottom of the box ( a single sheet of 12 x 12 paper) double sided paper works best for these boxes as the sides are folded back on themselves, but its personal choice , you can decorate them as you wish.I then made the top of the box from very thick card and decorated it with a vintage image and then embellished it. The lid has a small box attached to the inside of it so fits snuggly on top of the main box . These can then be filled to give as gifts. Happy makings
Bev xx

change of name

Hi all , this year I decided to spend some time and really try and get into the blogging world , so I have changed my blog name from MAvisMAdeit - to the Shabbied Up Granny. I hope to show you some of my more recent work and hope you enjoy seeing it as much as I like to make it . Crafting is my passion and at the moment papercrafting is top of my lists . I recently came across a tutorial on how to make an origami star box. I made a few for gifts at Christmas and everyone seemed to like them.I have recently adapted the box and will share a picture with you shortly